I’m not sure about Raspbian, but the dig application is not installed on Minibian by default. To install it (or on any Debian based distribution), you have to install the dnsutils package, which contains it:
sudo apt-get install dnsutils
Tag: raspberrypi
NoIP Dynamic Update Client on RaspberryPi (or Ubuntu)
Personally I like to use NoIP’s dynamic DNS services. This tutorial explains how to install the NoIP DUC on a RaspberryPi running a Raspbian based distribution, but it will work on Ubuntu or any other Debian based distribution as well. You should execute all of the commands below as superuser. As not to have to put sudo in front of all of them, it’s best to log in as root or switch to root with sudo su.
Step 1: Install prerequisites
You will need some software to install and run the DUC software. Execute the following commands:
apt-get update

apt-get install build-essential python-setuptools

easy_install killproc
Step 2: Download and install the DUC software
Next you will have to download and install the DUC software itself. The software has to be built from source code, which is why we installed build-essential. The following commands will download and install the software:
cd /usr/local/src/

rm -r noip-*

wget http://www.no-ip.com/client/linux/noip-duc-linux.tar.gz

tar xf noip-duc-linux.tar.gz

rm noip-duc-linux.tar.gz

cd noip-*

make install
The commands above will first remove any previous source downloads for NoIP you might have had. Next it downloads the sources for the software and installs it. After installing it should immediately start the configuration wizard, which you can always restart using the command “/usr/local/bin/noip2 -C“. The configuration wizard will ask for your NoIP account details, as well as the host you want to be using. This should be mostly straight-forward. When it asks if you want to run anything on an update, you should probably just enter “No”.
Step 3: Running the DUC software on startup
By default, the DUC software will not start when you reboot your system. This is where killproc comes in, which we installed earlier. What we have to do now is set up an init script. We’re going to be using a simple script, as is described in the software’s readme file, with a slight alteration to make it work on our distribution. I have the script uploaded on my webserver, so you can just download it to your drive. Execute the following commands to install it and set it up:
cd /etc/init.d

wget http://ibeblog.com/files/noip2

chmod +x noip2

update-rc.d noip2 defaults
Step 4: Reboot
You’re all done now, so you can reboot the system now and when it boots up, the NoIP DUC software should be running.
Sources
Setting up the PiFace Digital with Raspbian/Minibian

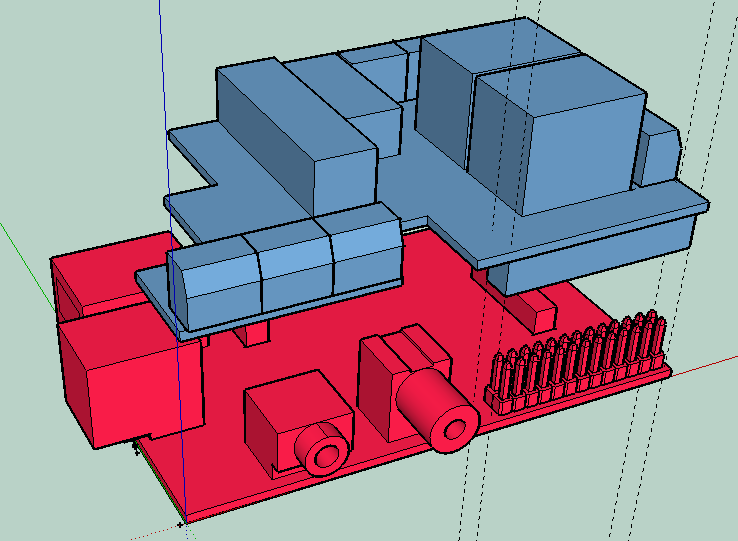 The PiFace Digital is an I/O expansion board for the Raspberry Pi. It has to be installed by plugging it on to the GPIO of the Raspberry Pi. The PiFace website has its own guide which tells you how to set up the PiFace. I’d also like to provide you with my own guide to do this on Raspbian or Minibian.
Before proceeding, you should make sure you have executed step 2 and 3 of my first steps guide for Minibian. If you are logged in as an account other than the root account, you should add “sudo” in front of all of the commands described in the guide. If you are running Raspbian with a desktop environment, you have to open a command-line terminal window first.
Minibian, first steps!
Congratulations! You are now running Minibian on your Raspberry Pi! But what do you do now? Regardless of your goal for the Raspberry Pi, there are a few things you should do before proceeding after you first install Minibian. (Or any other operating system for that matter).
Step 1: Change your password!
Minibian comes with a root account named “root“, with the password “raspberry“. Like you would on any system, it is fairly imperative that you, at the very least select your own password. It is possible to set up your own user account which can be elevated to root privileges only when needed, and at the same time just getting rid of the password for the root account all together. But to keep things simple, let us just start by setting a custom password for the existing root account. To change the password, log into the system and simple type “passwd” into the command-line interface. You will be asked to enter your new password and a second time afterwards to confirm it. The reason why this step is so important, is that the root account has the ability to access and modify the entire system. If someone else gains access to your device’s root account, they might damage the software or even the hardware.
Installing Minibian on the Raspberry Pi
 As far as Linux flavors go, I’m a Debian fan, running Ubuntu where ever I am able. So I like to run Raspbian, or more specifically, Minibian on my Raspberry Pi. What is Minibian you ask? The Raspberry Pi Foundation provides its users with the Raspbian image. Raspbian is a port of the Debian operating system, using the LXDE window manager. Its purpose is to provide a clean lightweight desktop environment which users can install onto their Raspberry Pi. Like me, many people don’t need or want a desktop environment running on their Raspberry Pi. Even through it is fairly lightweight, even LXDE will eat CPU power, memory and disk space. One option is to remove all software packages you don’t want from the Raspbian image after you have installed it. I will be using the Minibian image instead. It is a minimal image based on Raspbian for the Raspberry Pi, which strips all of the software you don’t need, including the desktop environment. Any packages you are missing, you can install later on.
PiFace!

 My PiFace is here! I ordered this two days ago from the Dutch retailer Minifo. I won’t lie, ordering it was a fairly trying experience. Their website responded rather sluggishly and when I first tried to order, it failed to open the payment gateway, leaving me with an open unprocessed order on my account, which I can’t do anything about. They also only offer free shipping starting at a €100 order. But I can’t argue with the delivery. It was delivered within 2 days as promised.
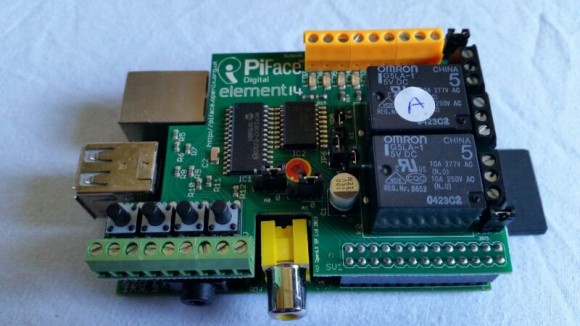 I’m looking forward to playing around with this, I’ve had a Raspberry Pi since it was released, as I had pre-ordered it, but it has just been gathering dust in one of my “computer related stuff drawers”. I might post some things about the Pi and the PiFace on this blog as I go along. As usual, probably notes and tips I find useful myself.