IntelliJ IDEA 14.1 HiDPI issues

I’m a user and big fan of JetBrains’ IntelliJ IDEA IDE. Having tried and used several Java IDEs in the past, I personally think it’s the best out there. On top of that, every major update bring a couple of new amazing features.

Yesterday the 14.1 update of the IDE was released. As usual I rushed to download and install the new version, after a quick glance of the release notes. But as a first, I ran into a major issue.

I’m usually use my desktop or my laptop for programming, but a while ago I got myself a Microsoft Surface Pro 3, to carry around more easily. I also use this for programming. The Surface Pro 3 has a very high-resolution display, which makes whatever is displayed look nice and crisp. But if you use the native resolution, everything will also be very tiny. Microsoft has solved this issue by having Windows do DPI scaling of applications. This essentially simply scales them up to make everything readable to the user. Some applications support this and those that do provide a very nice upscaled crisp interface.

Up until now, IntelliJ has not supported high DPI displays, and as a result, the native OS would just scale it up, making text look slightly blurry, as well as other elements in the UI. To resolve this JetBrains has worked on adding support for these displays on all platforms into their IDE. This is where it got messy.

After installing the new version, and running it, I quickly noticed that there was something wrong. My code looked very crisp for sure, but it was incredibly tiny. Also icons on the toolbar had been shrunk down to a small size. To find the answer, I had to dig through some of JetBrains’ bugtracker issues and found a fix for the problem.

The problem is that (for some reason) the IDE does not detect that I’m running a high-DPI display. So solve this, you have to force it into the HiDPI mode. You can do this by editing the vmoptions files for the IDE, which are located in the same folder that holds the IDE’s binary files. For example “C:\Program Files (x86)\JetBrains\IntelliJ IDEA 14.1\bin” on Windows 8.1 x64. Add the argument -Dhidpi=true to the end file. Be warned though, there are vmoptions files for both 32-bit and 64-bit, make sure you change the right one, or change both to be sure.

It’s clear that there’s still a few issues for JetBrains to work out, even in HiDPI mode, the text in the tip of the day window is pretty small, but they are well on their way towards properly supporting these displays.

Read More

Tar (+GZip) individual (sql) files in a folder

I had been backing up a MySQL database with a simple shell script for a while now. What I somehow forgot to add to the script was a command to compress the SQL dumps before uploading them to my backup server. The script had been running for a few months, so manually compressing each file wasn’t much of an option. So I wrote this little shell script do the work for me.

The script places all of the sql files individually into a tar archive with GZip compression. The new file uses the old file’s name with “.tar.gz” appended at the end. The old file is deleted after the compressed archive has been created.

You can of course do this for other files, just change the *.sql mask to work with different files. If for some reason you just want TAR files without the GZip compression, replace the tar line in the script with “tar cvf "${file}".tar "${file}"“.

Read More

Check available diskspace on Ubuntu (CLI)

If you are running an Ubuntu (or other linux) commandline interface, you might have to check how much diskspace is available on the system. You can easily have the system output a list of the disk space usage on all mounted filesystems with the command df -h.

The output depends completely on how your system is set up, but it will look something like:

Read More

Setting up the PiFace Digital with Raspbian/Minibian

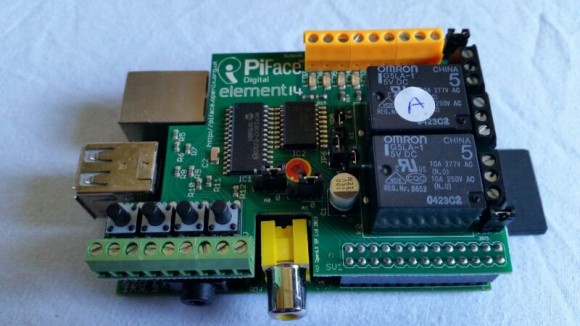
pifaceUnconnectedThe PiFace Digital is an I/O expansion board for the Raspberry Pi. It has to be installed by plugging it on to the GPIO of the Raspberry Pi. The PiFace website has its own guide which tells you how to set up the PiFace. I’d also like to provide you with my own guide to do this on Raspbian or Minibian.

Before proceeding, you should make sure you have executed step 2 and 3 of my first steps guide for Minibian. If you are logged in as an account other than the root account, you should add “sudo” in front of all of the commands described in the guide. If you are running Raspbian with a desktop environment, you have to open a command-line terminal window first.

Read More

Minibian, first steps!

Congratulations! You are now running Minibian on your Raspberry Pi! But what do you do now? Regardless of your goal for the Raspberry Pi, there are a few things you should do before proceeding after you first install Minibian. (Or any other operating system for that matter).

Step 1: Change your password!

Minibian comes with a root account named “root“, with the password “raspberry“. Like you would on any system, it is fairly imperative that you, at the very least select your own password. It is possible to set up your own user account which can be elevated to root privileges only when needed, and at the same time just getting rid of the password for the root account all together. But to keep things simple, let us just start by setting a custom password for the existing root account. To change the password, log into the system and simple type “passwd” into the command-line interface. You will be asked to enter your new password and a second time afterwards to confirm it. The reason why this step is so important, is that the root account has the ability to access and modify the entire system. If someone else gains access to your device’s root account, they might damage the software or even the hardware.

Read More

Installing Minibian on the Raspberry Pi

Raspi_Colour_RAs far as Linux flavors go, I’m a Debian fan, running Ubuntu where ever I am able. So I like to run Raspbian, or more specifically, Minibian on my Raspberry Pi. What is Minibian you ask? The Raspberry Pi Foundation provides its users with the Raspbian image. Raspbian is a port of the Debian operating system, using the LXDE window manager. Its purpose is to provide a clean lightweight desktop environment which users can install onto their Raspberry Pi. Like me, many people don’t need or want a desktop environment running on their Raspberry Pi. Even through it is fairly lightweight, even LXDE will eat CPU power, memory and disk space. One option is to remove all software packages you don’t want from the Raspbian image after you have installed it. I will be using the Minibian image instead. It is a minimal image based on Raspbian for the Raspberry Pi, which strips all of the software you don’t need, including the desktop environment. Any packages you are missing, you can install later on.

Read More

PiFace!

pie-faceMy PiFace is here! I ordered this two days ago from the Dutch retailer Minifo. I won’t lie, ordering it was a fairly trying experience. Their website responded rather sluggishly and when I first tried to order, it failed to open the payment gateway, leaving me with an open unprocessed order on my account, which I can’t do anything about. They also only offer free shipping starting at a €100 order. But I can’t argue with the delivery. It was delivered within 2 days as promised.

RPi-PiFaceI’m looking forward to playing around with this, I’ve had a Raspberry Pi since it was released, as I had pre-ordered it, but it has just been gathering dust in one of my “computer related stuff drawers”. I might post some things about the Pi and the PiFace on this blog as I go along. As usual, probably notes and tips I find useful myself.


Read More

Merge upstream changes with Git

Let’s say you want to work on some code in a git repository. To do this, generally you will “fork” this repository, by cloning it into your own repository. On GitHub there’s a simple “fork” feature that takes care of this. After a while, you might have made some changes, but the original repository that was forked might also have new commits pushed to it. A question many new git users then face is: “How do I pull the upstream changes from the original repository into my own?”

Read More

WinMerge as mergetool with Git(Hub) for Windows

WinMerge is a great free tool for merging conflicts when working with a version control system like Git or Subversion. To use it with Git(Hub) follow the following steps:

  1. Locate your .gitconfig file. If you’re using GitHub for Windows, you will certainly find it in your user folder.
  2. Add the following text at the bottom of the file:

    If you’re still using a 32-bit version of Windows, Replace “Program Files (x86)” with “Program Files”.
  3. To merge a conflict, open a shell and browse to your repository’s root folder.
  4. Use the command git mergetool to merge the conflicts with WinMerge.
    If WinMerge doesn’t open, Git might still be trying to use a different tool, try again with git mergetool --tool=winmerge.

Read More

Delphi: Absolute

You don’t often come across a piece of Delphi code that uses the keyword “absolute”. A lot of Delphi programmers consider it to fall in that “stay away” category, like “goto”. The keyword, when used correctly can however be very convenient and improve the readability of your code.

The absolute keyword allows you to define a variable that points to the memory location of another variable. This is something you can achieve with pointers as well, but the absolute keyword allows you to do it very cleanly in a single line of code.

Read More