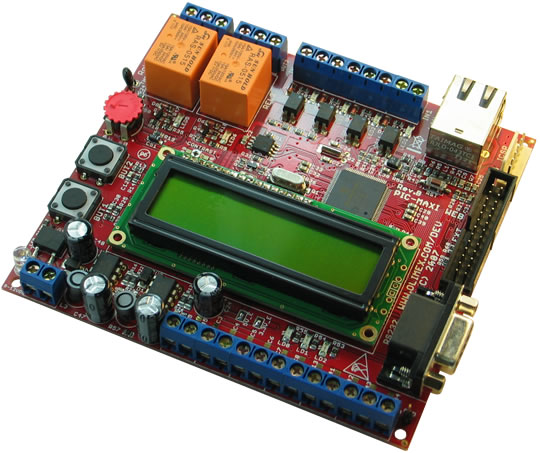
 The Olimex PIC-MAXI-WEB board features a Microchip PIC18F97J60 microcontroller. This article will shortly demonstrate how to write a program to the flash memory of the device so it can be executed. For this tutorial, you will need a Windows computer and a Microchip PICkit 3 programmer (or a clone of that specific device).
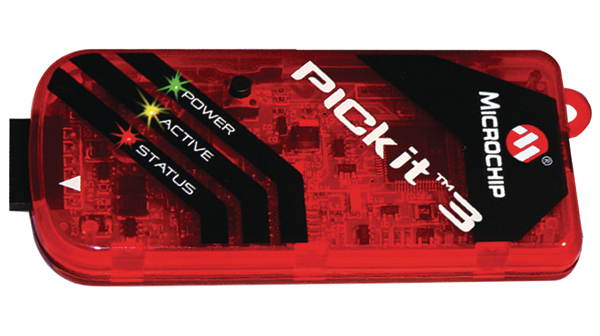
The PICkit 3 is a device created by Microchip which can be used to program other devices. It is a fairly expensive device, generally coming in around $70, but it is possible to pick up a clone for as low as $10-15 on sites such as AliExpress. These clones typically work just as well as the original.
Connecting the programmer
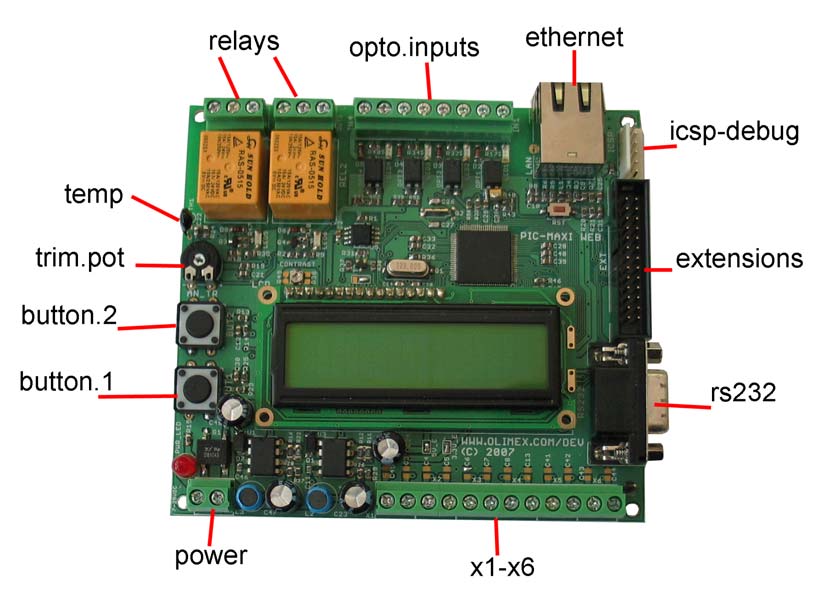
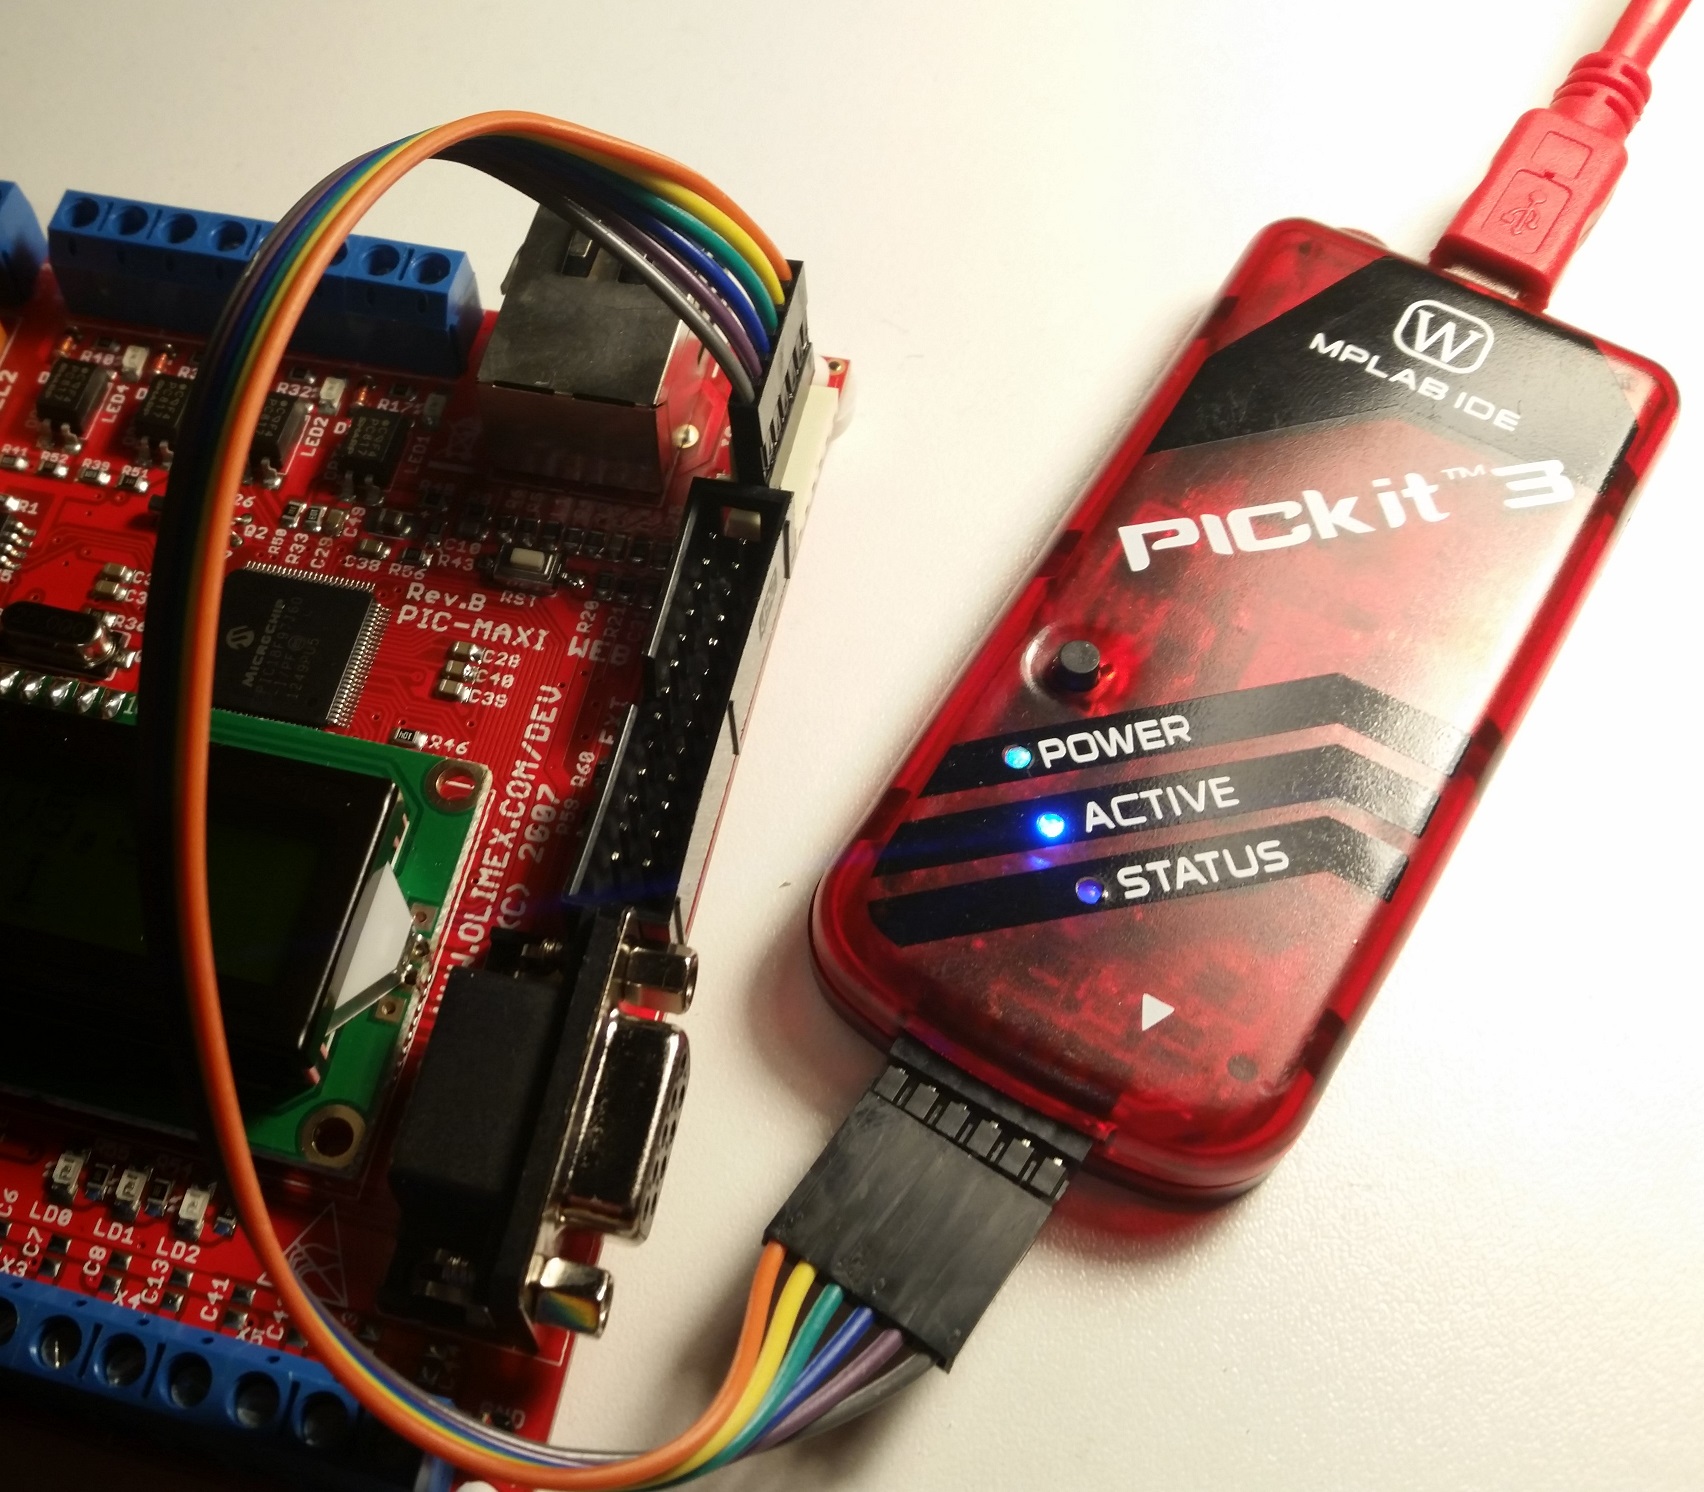
To get started, we have to connect the programmer to the PIC development board. The PIC-MAXI-WEB has an In-Circuit Serial Programming (ICSP) port, which is located in one of the corners of the device, as seen in the picture below. This is a special interface used for programming microcontrollers, which is most commonly used by Microchip for their PIC devices.
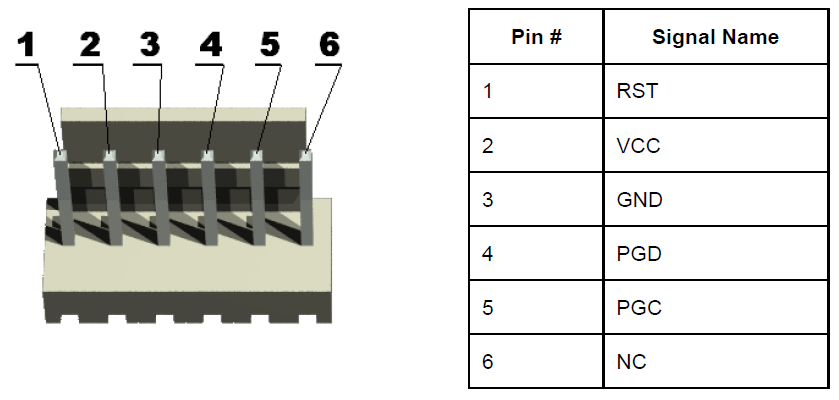
It is important to connect up the pin header on the end of the PICkit 3 to the ICSP port correctly. The pins of the ICSP port on the PIC-MAXI-WEB board are listed in the following table:
The pins of the ICSP port on the PICkit 3 programmer are listed in the following list:
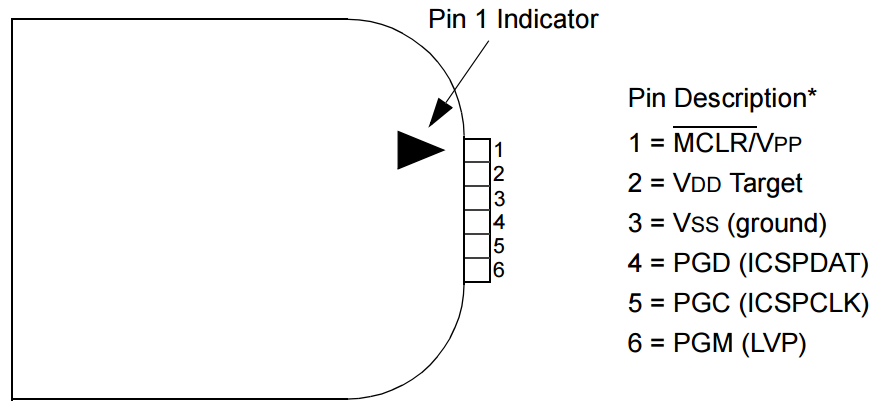
It should be evident from the pictures of the ICSP ports, that you can easily connect them. The PICkit 3 has a small arrow drawn on the casing, which is also shown in the diagram above. When connecting up the ports, it is important to make sure that the pins match up. This means connecting PGD to PDG, PGC to PGC, VCC to VDD, GND to VSS and so on.
Programming the PIC
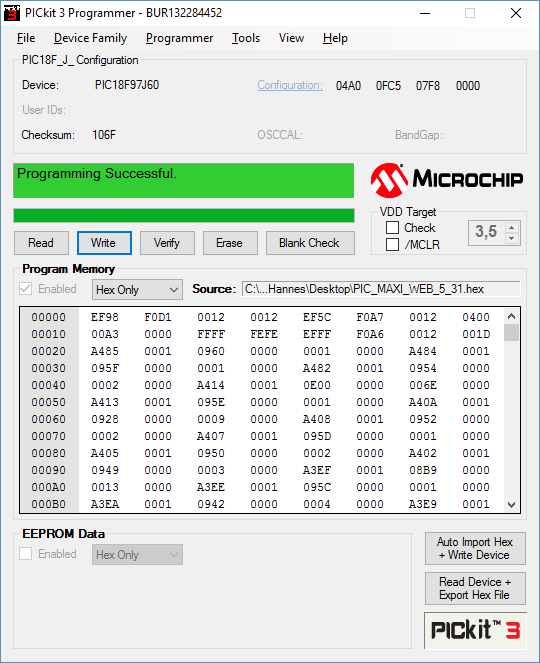 As a demonstration, we will flash the most current TCP-IP stack available for the device (version 5.31). It can be obtained here (mirror). What’s needed from this zip archive is the “PIC_MAXI_WEB_5_31.hex” file, which is the firmware we want to load onto the PIC.
Microchip offers the MPLAB X IDE, which can be used to both write programs for the PIC and deploy the programs to it, but we will be using a stand-alone tool specifically for the PICkit 3 instead. This tool “PICkit 3 Programmer” is more convenient to work with when you’re just flashing firmware, but only available for windows. It can be obtained here.
Once installed, the tool should immediately detect the PICkit 3 connected to the computer, as well as the PIC device it is connected to. You will want to open the hex file through “File -> Import Hex”. Next you can simply click “Write” to flash it to the PIC. You may want to backup the PIC’s current software by first clicking “Read” and then “File -> Export Hex”, so you can restore it later. The stock firmware which the PIC-MAXI-WEB ships with can also be obtained here.
Resources